Archive | Tips and Tricks RSS feed for this section

Root any Android phone without hassle!

13 Jan

Android is really a fun mobile OS providing you the ability to customize it the way you like, or to install as many  app you want. But if you really want to take full advantage of the OS, you need to root the device. For those who don’t know, rooting is the method of getting root access (Android is Linux based after all) to the OS, or in other words it’s way to have full permission to practically do anything. Rooting also enable to install the apps which require to perform system level changes/access.

Now, as we know, rooting is powerful and more fun, question comes how we do it? And also if every mobile is rootable or not?

There are several versions of Android and every version is further customized by the mobile phone manufacturer to stand out. But this adds difficulty when it comes to rooting and most of the times the phone doesn’t root at all. And, if you’re not making something (rooting, in this case) you’re actually breaking it i.e. the phone can be rendered useless if not rooted properly. So, before you try, remember your warranty will completely void and you may end up with total plastic which do nothing.

Precautions out, and if you still dare, then here comes a very handy and comfortable tool to root the Android phones – Unlock Root. This is one stop solution to root practically any device running on Android OS version 2.1 (Eclair), 2.2 (Froyo), 2.3 (Gingerbread) and 4.0.x (Ice-cream sandwich). Some notable devices (some of which are pretty nasty to root as well) are HTC Wildfire S, HTC Desire S, Samsung Nexus S, Samsung Galaxy Nexus, etc.

Interested? Just follow these very easy to use steps to root your phone and to unlock the world of possibilities.

Go here to download Unlock Root. Install this and make sure that your device drivers are also installed.

1. Open the Unlock Root application. The main window will open like this –

Main Interface

Unlock Root main interface

2. Make sure that your device must be in USB Debugging Mode. If not then just go to Settings > Applications > Development and then selection the option of USB Debugging Mode.

3. Now once you connect your device to the PC, it’ll be automatically detected by Unlock Root program and a prompt will come just like this –

Device Detection

Device Detection

4. Now you’re presented with very easy to understand two options – Root (the BIG red button) and UnRoot (the other small button). Rooting will essentially install one Superuser.apk file which will in turn grant you full permission.

Root Device

One-click rooting of the device

5. Optionally (but highly recommended by Unlock Root people), you can install Power Saver tool as well to improve the battery life. This can also be done right from the same interface.

Power Saver

Install to extend battery life

6. Finally, you’re done! Now the application will require you to reboot your device and present you with this friendly message.

Reboot

Reboot message

7. Done! Once rebooted your device will be properly unlocked. Enjoy the real freedom!

8. If, for some strange reasons, you want to unRoot your device, you can also do so with the Unlock Root application. Just connect your device and press that small little UnRoot button and you’re good to go.
How to get rid of Facebook Timeline (and bonus)?

3 Jan

If you don’t like the new Facebook Timeline and want it to removed in lieu of old Facebook Profile page, then you should know one thing – Facebook is not gonna do that, at least not anytime soon. So, can you get the old Profile page back by any means? The answer is – Yes, of course you can. Though the method is not official (in fact is complete opposite to that), it’s entirely harmless way to get the old Facebook Profile back. Read on!

Few hours back, Mashable has done the story that Facebook Timeline doesn’t work on Internet Explorer 7, citing Facebook’s recommendation of using most up-to-date version of browser. So, it’s quite simple, use Internet Explorer 7 (IE7) or less and get rid of Timeline completely, isn’t it? The situation is slightly tricky here – First, if you have Windows 7 then you cannot have IE7 installed and latest version of IE(9) is already installed. Also, older version of software means lesser support, buggy experience and most of the all vulnerability to viruses. Also, in case of Facebook, chat will not work properly.

What’s the best way then? Enter the User Agents! Before you ponder about what it is (the Wikipedia page is not very comfortable to understand), lemme tell about this in brief. User agents are like identification of browsers. Simply put, a server identifies the browser by reading it’s user agent. So if you change the user agent, server will recognize you’re using different browser altogether. Easy!

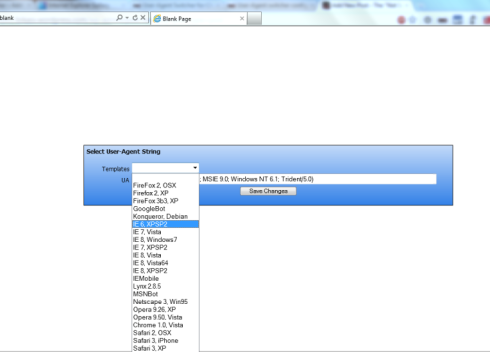
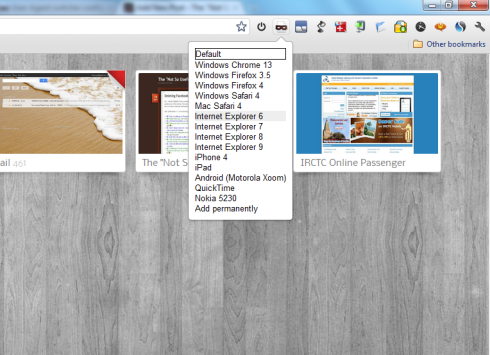
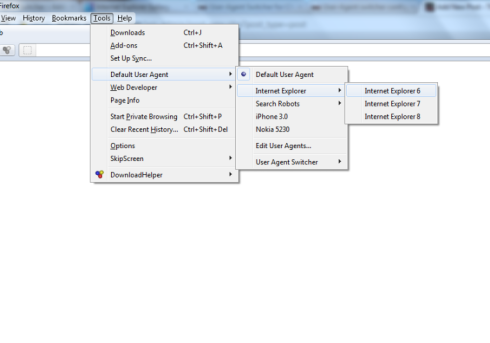
Now one final question arises? How can you change the user agent? Well, there’s an app for that (or extension to be more precise). Download user agent switchers for Chrome, Firefox or Internet Explorer. It’s simple to install and once installed you’ll get the option to switch/change the user agent of browsers (see images below for details). I recommend using user agent of Internet Explorer 6 to be certain that Timeline doesn’t come up at all.

Chrome ua

Change user agent in Chrome

FF ua

Change user agent in Firefox

IE ua

Change user agent in Internet Explorer.

There are other benefits of using IE6 user agent as well – the news ticker will be gone and the chat will cover entire right part of window when opened, much like good old Facebook. once you set the user agent, just refresh the Facebook tab and see the magic! All this and that too without any issue or security problems. But keep one thing in mind, this no-Timeline thing will only appear for you and your friend will still see the Timeline if on supported browser.

Let me know if you like the trick. Till then, Happy surfing!

Some time saving Tips and Tricks!

23 Oct

Many a times we get in the situation where we’ve to do repeated task. Some things can be done using Command Prompt, but then some requires more manual methods to do. Even command prompt works is not easy as it supposedly doesn’t allow you to do jobs in bulk (at least you’re not aware of it).

Here I list few of the simple tips and tricks to help you work faster and quicker. Almost each of them requires software to download, but given their small size and portable nature, I don’t think it’s gonna be much of a problem.

1. Get extra juice from your Clipboard:

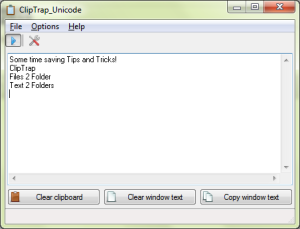
Microsoft’s inbuilt clipboard utility is great and is quite a lifesaver when it comes to copy and pasting things, but it’s quite basic in functionality. t only keeps track of last copied text, which may not be very convenient in the situations where you’ve to do a lots of copy and pasting. To help you out, comes a very small utility called ClipTrap. It’s very simple clipboard monitoring tool, which can be used on-demand. That means you can turn the feature off when you don’t need it. The interface is quite straightforward and requires almost zero configuration. Just launch the application and and it starts monitoring your clipboard and saves copied text in it’s own windows for later saving purpose. Neat, isn’t it?

ClipTrap clipboard copy tool

Manage Clipboard in better way!

2. Create folders and sub-folders in bulk:

Creating a folder is very easy task. But when you require to create a lots of folders then real pain comes. Microsoft doesn’t provide any bulk method to do this, right? Well, it’s nice to inform, that they actually do, but the method requires use of command prompt and good memory to remember the syntax. Creating the folders in bulk requires you to create a text file (say example.txt) and add the folder structure you want to create. So, if you want to create folders namely a, b, c (inside a) and d (inside b), you can simply write a, b, ac & bd in this text file, each in it’s own line. Now, place this text file in the folder where you want these new folders to be created, fire up your command prompt and go to the same directory. Finally, call this function to create all the folders :

FOR /F “delims=” %i in (a.txt) do md %i

If you find the command prompt part is too difficult for you, then just download this simple utility called Text2Folder. This does the same thing as the command written above, all you need is to browse for the text file and browse the folder location where new folders are to be created and you’re done! One more advantage of using Text2Folder utility is that you don’t have to always copy the text file in root of the folder every time, the utility takes the pain for you. The interface is quite simple as you can see below.

Text2Folder - Create Folder with the text file

Creating folders in bulk was never so easy!

3. Create folder by filename and move the file in it:

Most of the times we want to copy some files in a folder and arrange them properly (happens mostly in case of unsorted movies and music, isn’t it?). If you also need such a too then download Files2Folder. This is not actually a tool but a simple shell extension (you know, something that comes with your right click!). When you start Files2Folder (must be elevated in case of Windows Vista/Windows 7), it simple ask if you want to register the shell extension, press yes and you’re done. A new right click entry for the files and a shortcut to unregister this shell extension will be created. Now click any file and select “Files 2 Folder” and you’ll immediately see a new folder is created having the same name as the file and the file is moved to this folder. Quite is time saver, isn’t it?

Files2Folder installation

Just press yes after you launch Files2Folder!

Files2Folder create folder

On right click you'll see option to create folder

Final result

Finally folder is created and file is moved to the folder


4. Print directories and files to a file:

Sometimes, we need to have a structure of files and folders in some particular locations/folders. We may need this if we need to make some changes in system and want to maintain the folder structure or if we want to send this information to someone. But whatever maybe the reason, getting directory structure is not much of issue if you know Command Prompt, and you just have to type this in your command prompt –

dir /a /s > location/output.txt

where /a (optional) anchor lists all hidden files and folders, /s (optional) lists the sub-folders, location is where you want to save your output and finally you can replace output with any name. but it’s somewhat complicated for those who are not very comfortable with command prompt. Also, this method has quite limited – you cannot customize the output; as the output is plain-text, formatting it properly is another pain; creating directory structure of multiple directories is difficult (although possible); and finally, every time you require the directory structure, you’ve to go to the folder through command prompt.

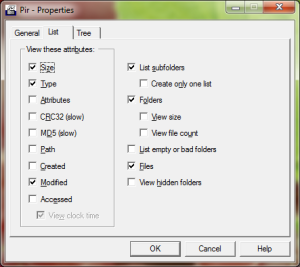
To address all these issues in single shot, just download this cool little portable utility called Pir. With Pir, you can decide whether output be in list, tree or combination of both. You can select multiple folders to be printed in single out. Also, the output is well formatted RichText, which can be edited as per users need before saving, unlike command prompt method. Just go through following screenshots to see Pir’s features in detail –

Pir Start

You can select multiple locations and select the output type

Pir - List mode

You can decide how the output list look like

Pir - Tree Mode

Like lists, you can also decide how output tree will look like.

Pir - Output

The final output of Pir - You can customize it before saving!


Do a partial system restore!

6 Oct

Many times, we get in a situation when our Windows system go kaput, and we’re left with no other option but to restore the system. We know that only a file or two is corrupted, but we end up in restoring the whole system, which may solve this issue and create many other issues like file inconsistency or data loss. Windows system restore utility is not quite feature rich and definitely not helping us in restoring only particular file.

If you’re suffering from same issue and don’t want to restore whole Windows, you need to check this utility called System Restore Explorer. It small (838 KB) little tool which helps you in performing partial system restore. Now in order to restore, just follow the instructions given below:

Before proceeding, make sure that you’re using Windows Vista and above. This utility will not work on Windows XP, it won’t even install on that system as well.

Instruction to perform partial restore:

  • Download the System Restore Explorer and install it. Remember, administrator privilege is required to install and run this application.
  • Launch the application and you’ll be presented with list of system restores created by Windows, which looks something like this –
Main Interface

SRU-1

  • By default the check-box is selected which hides the restore made in last five days. You can un-select this option to see all the restore points.
  • Now, highlight the restore point and click on the Mount button. You can also mount by right clicking the restore point shown below –

Mounting restore point.

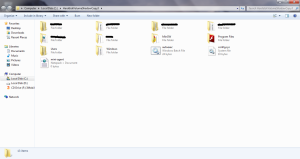
  • Once the restore point is loaded, you’ll see a shortcut is created in the drive where restore point is located (usually C:). Just click on this shortcut and you’ll be presented with the files and folders on that restore point.

Files and fodlers after restore point is mounted.

  • Now, simply copy the files/folders and replace it with existing one to make a restore.
  • Once done, you can either use the System Restore Explorer to unmount the restore point or simply delete the shortcut. It’ll not delete the restore point, but just the shortcut.
Aside

Fun with CSS – In whole new way!

5 Oct

Hi friends,

You know that how much messy (not that difficult though) CSS is when it comes to write/edit the code for it. Without any tools, it simply a pain to use CSS, but it’s strengths cannot be neglected and it’s use is guaranteed if a good web page is to be made. Hence, good CSS tools comes in to the picture.

Today I’ll tell you some online tools to help you through various CSS related works tad easily. Just go through these tools and use that suits your needs.

1. CSS Load: It’s simple tool that creates custom CSS spinners and bars for AJAX and JQuery. Quite useful if you want to display these kind of animations in your web page as it just takes few seconds to create very good spinners/bar. It’s completely WYSIWYG interface and you just have to select type of spinner, their colors, width/height and animation speed and a visual output displays the output right away. Once you’re satisfied with your code, just click Get Code and use it any way you want. Simple!

2. WebPutty: If you want more control over CSS files and want to store the output over the cloud as well, then CSS Load is not a sufficient tool. You need more powerful tool that can handle more than just simple CSS animations. Welcome WebPutty! It’s great tool which uses your Gmail as login and provides yo with handful of features. It’s a 2-pane window, with code on right and output on left. Just modify the code and the output can be seen right away. It’s requires more skill than CSS Load is it’s not completely WYSIWYG but still it’s quite powerful and it supports HTML5 as well. An example page is thrown in so that you can learn before creating your own pages. Very good tool for professionals!

3. XEO CSS Editor: Now it’s the tool which charms newbies and professionals alike! It’s not just very good CSS/HTML editor but it’s very good learning tool as well. The User Interface is quite intuitive and provides you with lots of features. The output page is displayed in main interface, left to which is all CSS tags applied to the page. The top contains various sections like CSS editor, HTML editor, CSS code (the output file), and preview (the main interface that opens up when you load the page first time). Though HTML editor is not a WYSIWYG but it’s not it’s purpose as well. CSS Editor is WYSIWYG and it gets the job done very well. You can create a new page here or open existing file which contains HTML and CSS in it, or just HTML file. Now you can apply CSS the way you like and the get the output CSS right away or alternatively you can save your work which requires a (free) registration.

Just choose any of the CSS tool as per your liking, and enjoy CSS like never before!

Aside

Get old Facebook UI back – Revisited!

5 Oct

Hi Guys,

I’ve covered a way to remove real-time news ticker and fixed nav-bar. Also, I’ve covered a way to get old Facebook UI back in my post, but it’s not working anymore. Today, I’m gonna cover most important part of Facebook – it’s News Feed Section!

As we all know, with Facebook’s recent update, the news section has gone out of hand of many people, as it’s started categorizing the news feed in various sections like New Stories, Recent Stories, etc. but which story is important to the user is not decided by us but by Facebook. And here comes the problem – we are loaded with lots of news which we don’t want to see and the news which is actually important to us is lost somewhere between useless feeds.

Well fret not! If you’re a Google Chrome user (I’m still to find the solution for other browsers), then I’ve a solution for you. Just download Facebook Classic chrome extension, install it and open/refresh your Facebook page. Now you’ll see only Recent Stories section with no blue triangle and the news feed organized in the old way! This will also remove the real-time news ticker, but it’ll be visible if chat bar is open. So just, close the chat bar and you’ll find good old Facebook back.

Aside

Change ship – Tumblr to WordPress without any hassle.

29 Sep

So, you don’t like Tumblr that much, hah? Yeah, it’s cool way to post anything in anyway, but still it lacks a lots of features like categories, widgets, finer control over the blogs/comments. heck you cannot even feel like it’s your own blog because you cannot control the way you like.

Coming to your problem, you may want to switch to some other blog, a blog that gives you finer control of things, gives you a lots of features to customize and enhance the blog, a blog powered by WordPress, maybe. But you have a problem in that too – How can you leave all great tumblogs you’ve created when on Tumblr. I mean some of them might be personal favourites as well. You can move to WordPress but not your blog, and definitely not the date posted even if you try writing them again manually, right? Wrong! Read on.

Thankfully, there is a simple web service to help you in this case. Behold Tumblr 2 WordPress!! It really has 1-2-3 step process to move your favourite articles to your favourite Blog provider. just follow the below mentioned steps:

  • Go to Tumblr 2 WordPress and click Let’s Get Started button.
  • Fill in the details in the form which is quite straightforward. Follow the image for instructions if you find it difficult to do yourself.

Tumblr2WP

  • Now click export.
  • Your page will refresh and you’ll get 1 xml file to download named as tumblr_<yoursitename>.tumblr.com. Save this file in safe location as you’re gonna need it.
  • Now login to your WordPress account (create a WordPress account if you haven’t already done so. It’s straightforward), and go to you dashboard.
  • Now go a bit down the page and you’ll find Tools button on left hand pane. Expand this option and you’ll find Import option, click on it.
  • Now you’ll find several options in it. Just select WordPress and in next screen choose your xml file and select upload and import.
  • Select author as yourself and check the box that says Download and import file attachment.

Done! Your brand new WordPress Blog is up and ready. Now if you want the WordPress blog looks like Tumblr one, you got covered in that too. Just go here to find Tumblr like themes for WordPress, or completely mold it into Tumblr look-alike blog by using WooTumblog.

Have fun with your brand new blog site which, of course, contains all your blogs!!

Aside

Get Symbian developer certificate and key from Nokia.

29 Sep

Ohh,

You poor Symbian user. Can’t install that app just because it’s unsigned, duh! Well, jokes apart, this is the typical issue we face every time we try installing some apps on our phone. Generally we don’t even know ho to get those dev cert and key required to sign the file and once we get those then how to sign them is also a issue.

Well today I’ll discuss those issue one by one and get you out from the install error hell.

Starting with the process, the first thing you’ll need is a account on SymbianSigned. Just head over to the website and click register to get started. Now follow the below mentioned steps –

1. Fill in all the details in below mentioned fields and make sure that you use corporate / personal web or blog email and not public email like yahoo, gmail, etc.

2. Now, these details are optional, you can simply select “Are you associate with company?” to no and proceed.

3. Now just confirm your account from the email you got and you’ll be presented to this screen. Just see there is a empty IMEI list.

4. Now, just below that, you’ll find Add IMEI section. Just input your 15-digit IMEI here (Press #06# in your phone to obtain your IMEI), and give any description you want. Click Add IMEI.

5. You’ll see the IMEI list, which was empty is now filled with the IMEI details given just now. It’ll look something like this.

6. Finally, on the right hand side of IMEI list, you’ll find the option to upload your sis fine to sign it or download the certificates for manual signing.

7. Now if you’re a new user, or just don’t want to get involved in manual signing, just upload your files and you’ll get it signed in some time. But it’s time taking process and you’ve to be patient.

8. If you want to do manual signing, just download one more tool called SISContents. It’s nifty little tool, which can handle signing very well. SISContents also contains the cert and key file of itself, but you cannot sign protected files with it. For protected file you just need to add cert and key files you’ve created in above process and you’re good to go.

9. The signing process for SISContents is explained here which I think is sufficient for anybody to understand the process.

Please let me know if you find this tutorial useful. If anything is not explained properly, I’m more than happy to help you out in those areas. Till then, have a trouble-free app installation on Symbian. Chao!

Aside

Windows Update not running on Windows 7.

27 Sep

Few days back I faced the issue with Windows Update. A red cross mark comes in Windows Update and when I tried to click on the Update button, I’m greeted with this message –

Windows Update cannot currently check for updates, because the service is not running. You may need to restart your computer.

And upon restarting as well, I’s greeted with same message. It’s very bad situation to be in (of course for those who’re using legit version on Windows), and I’s not able to figure out any method to update my OS and software. Have you also been in this situation ever? Well, then there is a good news – I finally figured out the way to make Windows update work again.

Just follow these steps:

  1. Click Start button and type services.msc in it. A service window will open up.
  2. Now look for Windows Update entry in it.
  3. Right click on Windows Update and select Stop. Don’t close service window as you’ll need it in some time.
  4. Now head over to C:WindowsSoftwareDistribution.
  5. Delete all the files in this folder (don’t worry it’s safe and won’t harm your PC in any way).
  6. Go to service window and right click on Windows Update and this time choose Start.

Now you’re done. Just click Start button and type Windows Update and you’ll see you can update without any hitch!

Aside

Windows Update not running on Windows 7.

27 Sep

Few days back I faced the issue with Windows Update. A red cross mark comes in Windows Update and when I tried to click on the Update button, I’m greeted with this message –

Windows Update cannot currently check for updates, because the service is not running. You may need to restart your computer.

And upon restarting as well, I’s greeted with same message. It’s very bad situation to be in (of course for those who’re using legit version on Windows), and I’s not able to figure out any method to update my OS and software. Have you also been in this situation ever? Well, then there is a good news – I finally figured out the way to make Windows update work again.

Just follow these steps:

  1. Click Start button and type services.msc in it. A service window will open up.
  2. Now look for Windows Update entry in it.
  3. Right click on Windows Update and select Stop. Don’t close service window as you’ll need it in some time.
  4. Now head over to C:\Windows\SoftwareDistribution.
  5. Delete all the files in this folder (don’t worry it’s safe and won’t harm your PC in any way).
  6. Go to service window and right click on Windows Update and this time choose Start.

Now you’re done. Just click Start button and type Windows Update and you’ll see you can update without any hitch!