A Better Android DatePicker Plug-in for Cordova

14 Apr

Cordova (previously PhoneGap) needs no introduction. It’s the best solution to deploy websites developed using HTML, CSS and Javascript as a native app over wide range of mobile devices. Certainly mobile app built using web technologies has it’s own share of advantages and disadvantages, but this is not up for discussion in this post.

I’ve searched quite a few times in past for a way to invoke native DatePicker on Android using Cordova or any of it’s plug-in. Finally, I found one over official PhoneGap Plugins page. For starter, it serves the need as it pops the DatePicker and allows developers to capture the date selected using DatePicker in Javascript.

But as I started using it, there’re following few features I found missing in this plugin, especially in case of newer Android OSes (> 4.0) –

  1. You cannot set Minimum and/or Maximum Date in DatePicker. So, if there’s specific need to have date range, this plugin certainly fails to provide proper solution. It happens on all Android OSes.
  2. On Android OS > 4.0, the DatePicker loses Cancel button. I checked and this issue is with Android ICS itself, but it would be nice to have that button just in case user don’t want to enter anything once DatePicker is popped open.
  3. Also on Android OS > 4.0, user is no really required to press done to set date. Any action performed like clicking hardware back, or clicking outside the DatePicker pop-up, results in selection of date. Again this is default feature to ICS versions but definitely it’s a bad User Experience.


I searched over various StackOverflow threads but none of them were able to solve these issues completely, though in parts some of the issues were solved. So, I decided to create my own plugin. Of course, I’ve taken the existing plugin and created my own. You can find revised plugin at my GitHub page.

I tried to address all the issues I listed above. Using this plugin is quite easy, just like any other Cordova plugins. Just follow the instructions in the readme.md file in the project or go through the following steps –

Step 1: Copy and Reference –

Just copy datePickerPlugin.js file to your ‘www’ folder. Create a package com.bikasv.plugins.datepicker and put DatePickerPlugin.java file into this package. Now update your res/xml/config.xml with following lines –

<plugin name="DatePickerPlugin" value="com.bikasv.plugins.datepicker.DatePickerPlugin"/>
 

Step 2: Invoke –

Call following function if you need DatePicker –

    function handleDates(elm, options) {
        event.stopPropagation();
        var currentField = $(elm);
        var opts = options || {};
        var minVal = opts.min || 0;
        var maxVal = opts.max || 0;

        var myNewDate = Date.parse(currentField.val()) || new Date();
        if(typeof myNewDate === "number") {
            myNewDate = new Date (myNewDate);
        }

        window.plugins.datePicker.show({
            date : myNewDate,
            mode : 'date',
            minDate: Date.parse(minVal),
            maxDate: Date.parse(maxVal)
        }, function(returnDate) {
            if(returnDate !== "") {
                var newDate = new Date(returnDate);
                currentField.val(getFormattedDate(newDate));
            }
            currentField.blur();
        });
    }

And following for TimePicker –

    function handleTime(elm) {
        var currentField = $(elm);
        var time = currentField.val();
        var myNewTime = new Date();

        if(time) {
            myNewTime.setHours(time.substr(0, 2));
            myNewTime.setMinutes(time.substr(3, 2));
        }
        plugins.datePicker.show({
            date : myNewTime,
            mode : 'time'
        }, function(returnDate) {
            if(returnDate !== "") {
                var newDate = new Date(returnDate);
                currentField.val(getFormattedTime(newDate));
            }

            currentField.blur();
        });
    }

Step 3: Done –
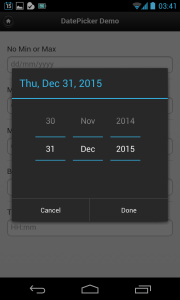
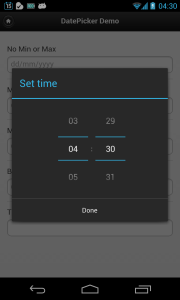
Now you can see the result. A DatePicker with ability to set Minimum and Maximum date. See following screenshots as it appears on Android 4.0+ devices:
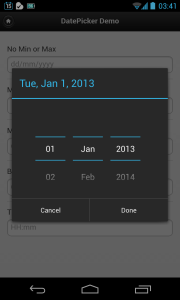
With Max Date With Min Date Time Picker
 

This plugin solves all three issues I’ve mentioned.

  1. You can set Minimum and Maximum date on DatePicker, and this works on all Android OSes.
  2. Cancel button is now present in DatePicker – something which is improvement over stock DatePicker.
  3. Clicking outside the DatePicker will do nothing, neither closes the pop-up nor update the date. Hardware Back button will not update the date as well. Again this is UX improvement over stock DatePicker.

Found any bugs or have any suggestions? Create an issue over GitHub issues page.
Project Link …

Take control of your Android – Tasker!

2 Aug

With my growing love towards great open world of Android and it’s being hard to cover them in one, I decided to start a blog series – Take control of Android. This series will primarily deal with the various tools and methods that helps to automate practically any task on Android. Also, there will be some tools discussed that will add ease of use and remote access to Android. Even if you happen to know a few things, I surely hope you’ll learn something new in this series.

Today, the app in discussion is Tasker – arguably best task automation tool available on Android platform. Tasker is not free though, and you’ve to shell out Rs. 346.94 to get your hands on it. But I must say, it’s totally worth it’s price and you won’t regret buying it.

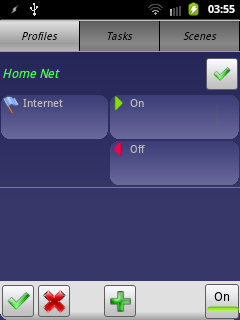
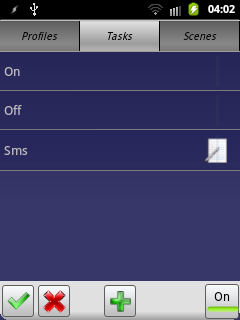
Once downloaded and installed, you can create Profiles which contains Tasks to be automated. One example is shown below –

Now, although Tasker is automating tool and is supposed to do repeated task with ease, the app itself is not that easy to use. There is small, not much I assure you, learning curve associated with this app. So, let me walk you through Tasker by creating one simple automated task.

For our purpose, let’s create a task to send SMS when we create Missed Call from our Favorite contact. Remember, this task will only send the SMS when a call is missed by the person who is in your favorite contact list. For everyone else, no action will be performed. So, let’s get started.

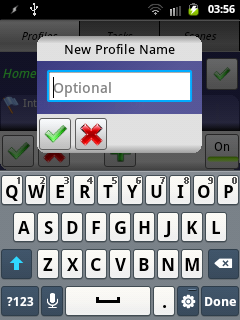
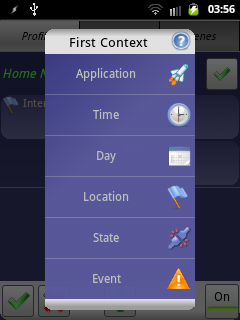
Click + on Profiles menu and give it some name. A new window will pop up asking to select First Context. First context is the condition which will be satisfied to execute the task. In our case this is a missed call from favorite contact.

Now select State in the menu and then select Phone and finally Missed Call.

Now select favorite contacts, either by typing C:FAV or by using search icon above the text box. Click check mark, and you’ll be presented with Tasks screen.

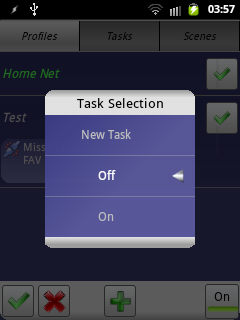
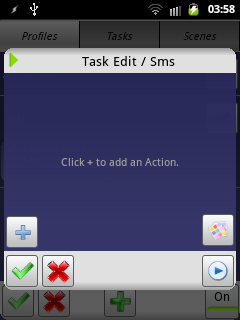
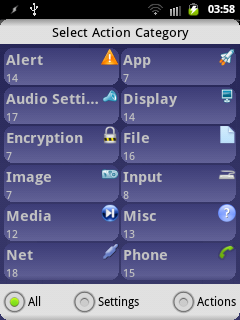
Now click new task, and in next screen click + icon. You’ll now be presented with Action categories.

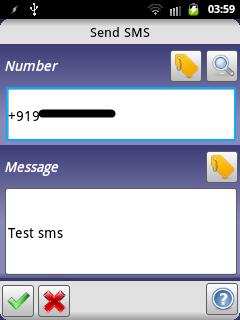
Choose Phone option here and scroll to bottom to select Send Sms option. Now type in the number of contact to whom SMS is to be sent, and the message and click the check mark. You’ll see the new Task created. Now click the check mark of this screen to have your profile configured.

Now, whenever you receive a missed call, the phone will automatically send the predefined text to the given contact.

You can add multiple tasks to the profile as well. Also, you can further customize the task by having Exit Task (task which will be performed once the main task is performed), moving the existing task to Exit Task, Change Task or Unlink Task. Just long press the task menu and you’ll get these options.

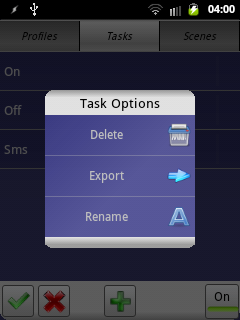
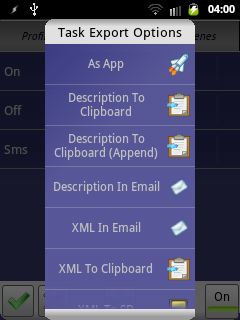
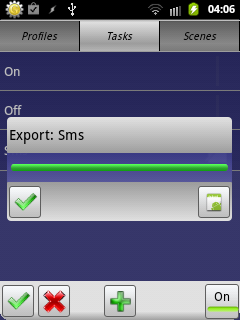
One of the coolest features of Tasker is the ability to export task in various formats, but the most promising being able to export them as an app. Just long press any of the task and select Export. Now select As App in next screen.

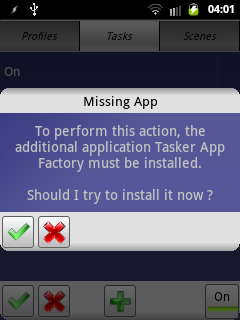
For app creation Tasker App Factory is required. If you haven’t installed it already, Tasker prompts you to install it. Also, the task must have an icon for this process to complete.

Once prerequisite is met, the export process will be started. Once the process finishes, the app will be ready and an icon will be shown, which on click, installs the new app.

This was just one example to simplify your life by automating the task, Taskers have many such arsenals under it’s belt. For example, for me, it automatically turns on the WiFi and disables the mobile internet when I reach home or the office. For rest of the places, it does the opposite.

Although, Tasker is very handy, very powerful and very versatile app, there’s a few gripes while using the app. I’d like you to know it before you spend your hard earned money on this app –

  • Tasker doesn’t catch the location with ease. So, the location based tasks may fail sometimes.
  • There are too many screens involved in creating single profile.
  • Corollary to above, developers might have provided with pre-defined profiles, those which are very commonly used.
  • Help should be bundled with the app rather than being online. Demo examples would be great.
  • Has a learning curve that can fend away novice users.

There are areas where Tasker shines compared to other automation apps (their review will come soon) –

  • Unlike some, Tasker is completely offline utility and doesn’t require external server to host tasks.
  • Already feature-rich Tasker, can further be enhanced with the help of plugins, which is abundant.
  • Memory usage of Tasker is quite less and doesn’t drain the battery much.

It’s clear that Tasker is quite powerful utility and it’s stated flaw is not as much as it’s benefits. But if you still want to have review of other similar tools before buying Tasker, I suggest you to check this blog in a while. I’ll covering a lot of automation tools.

Outlook web mail is here!

1 Aug

Finally, Microsoft has decided to go for more aptly named Outlook.com for it’s web mail service. It’s quite fitting and more professional naming compared to older Hotmail or Live Mail.

For those of you who wonders if someone really uses any other web mail other than the giant GMail, I must say it’s personal preference. For me, Outlook web mail (or Live Mail, or Hotmail. Huh!) is always very fluid, distraction free, and very integrated service. All the online features can be accessed from single ecosystem (I’ll come to that later), quite unlike GMail. There’s hell lot of space thrown, at least for previous users, and you can use them the way you want – for mails, or for any other files. Social integration is unparalleled too. But at the end of the day, it’s personal choice that matters.

With the new Outlook Web Mail, Microsoft has really stirred the web mail market with new freshness. The new Metro styled UI and loads of features really worth a good look for everyone. Let me walk you through Outlook.com with screenshots –

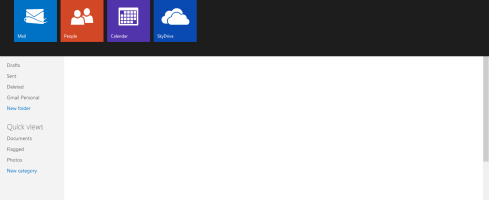
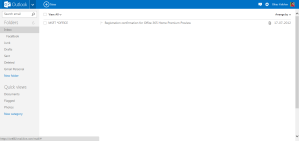
The Outlook.com opens with Metro style and at the same time minimalistic view, the way email should be.

Welcome Screen

Switching to other features is easy. Just press the drop down next to Outlook logo (appears on hover) and see the option to go to desired place. Visual and easy!

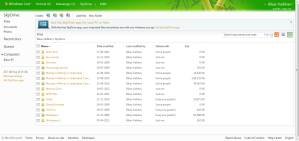
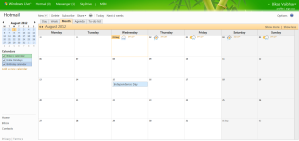
Following is the Skydrive and Calendar views, not much have changed here –

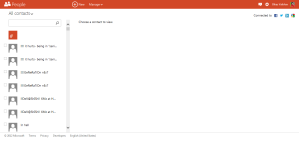
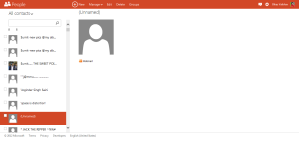
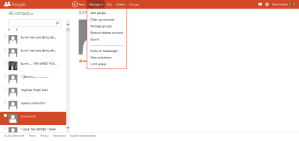
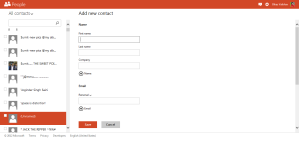
Contacts has been updated to new Metro style. Viewing, adding or editing contact is plain simple. You can also connect to various social networks to enrich your contacts and have them in one single place.

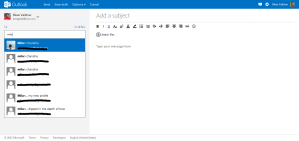
Composing mails is easy and it’s one of the prettiest screen I’ve ever seen in any mail service or client :). Since the contacts are socially connected, contact’s image is fetched when you search for them. This one screen has me sold!

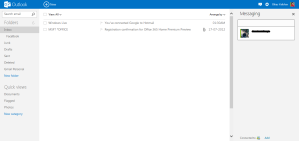
On main screen, if you click the message icon, you can connect to Messenger. Instant messenger appears on the right hand side and is quite easy to use.

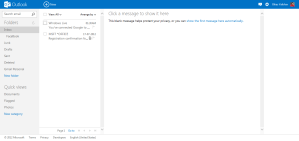
You can also choose where to reading pane – Off, Right, or Bottom.

Further mail settings can be customized using setting icon, next to messenger icon.

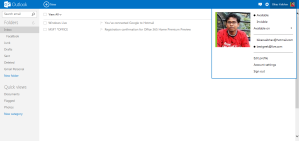
Finally, on top-rightmost position is your account and profile settings. Clicking it, reveals the profile picture, linked accounts, log out options and links to account setting.


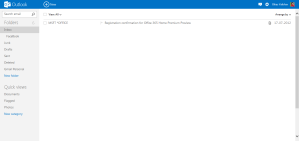
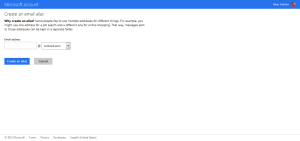
Now, something better to know. You can create alias for your existing email – this way you can avoid @hotmail or @live email addresses in lieu of @outlook. Fun right? Just head over to Alias Change option, and input your desired alias. You’ll then receive confirmation mail telling your alias is created, and you’ll be having brand new email address!

Finally, one last thing – Although most of the mail actions are given in top ribbon, there’re few more of them. In order to access them, just click Actions, on top-right of the mail. It’ll pop open the menu like below to give you further actions to perform.

Same blog, new Destination!

27 Jul

Finally I moved my blog to my own server. And of course, if you’re reading the post, you know the new URL :P. My new blog will be a self hosted WordPress blog, unlike the previous, hosted on WordPress site.

Once I jumped to self hosted WordPress, I figured there were handful of features missing compared to WordPress.com site. This was a bit of surprise to me at first, but then finding all the features of Freemium product in a completely free package is a bit childish.

Thankfully, the WordPress.org is blessed with outstanding community that helps it to build thousands of plugins for almost any needs. So I decided to implement features of WordPress.com through these enhancements. Here’s what I did –

Before the Start –

You need to export the content of existing blog to this new blog. Following steps were easy to understand and simple to use and I was ready to sail on new blog!

  • Go to the Dashboard of existing blog, and find Tools section in the bottom of left side pane.
  • Select Export option, and then select All Content and press download.
  • Now go to Dashboard > Tools of new blog site.
  • Select Import here and choose WordPress. You can also import from other blogs if you wish to.
  • Now upload the file you’ve just downloaded from previous blog.
  • You can select to download all your media from old blog to new blog. Optionally, you can also change the post author. Done!

Once the contents get in place, it;s make for blog makeover. I’ll walk you through WordPress.com features that I’ve implemented in my blog with just 3 plugins.

Publicize –

This is nifty little feature of WordPress.com I missed a lot in my blog. With Publicize, as soon as user Publishes the blog, it gets shared through various social networks. Nice way of promotion, right?

After some searching, I found WP-AutoSharePost that does the same thing as Publicize, but it shares only on Facebook and Twitter. But it’s quite easy to configure. Install the plugin, follow their instructions (you need to create apps for Facebook and Twitter) and you’re ready to share your blog to the world.

Auto link/tag suggestions –

Another cool feature WordPress.com has is the way it suggests tags for the blog post and link suggestions for the terms that appear in the post. This really enhances the blog post and in order to have this great feature on your own blog, you just need Zemanta. This nifty plugin not only does the link and tag suggestions, but it also suggest the related posts and images to be used in our own blog. Pretty neat, ha!

Stats, comments, Sharing, Subscription, Proofreading, WP.me shortlink and Video Shortcode –

Too many features and just one more plugin to go. Unbelievable, right? But you’ll be more surprised to know that the plugin in concern offer much more than what I originally need it for. Welcome, Jetpack. With Jetpack, you can see statistics of your blog, have social sharing options for each blog post, gives the blog ability to add comment by logging-in through social network, etc. It also adds features in posting screen with proofreading, wp.me shortlink, and video shortcodes, all of which i available in WordPress.com site. Jetpack also packs more feature under it’s belt, but I have not tested them yet as I just wanted to get all the WordPress.com features.

Do note that if you’re installing Jetpack for it’s comment features, read this article to get it working properly.

With all these plugins, I mostly done emulating WordPress.com website. Although there are many features are yet to be tested in real world (I still don’t know if the sharing works, for example), I feel I have all the features I need.

I hope you’ll find the post useful, especially if you’re also planning to have self-hosted blog. If you think something else is required in this post, let me know.
Chao!

The Dark Knight Rises – a Fan’s love is the Fan’s hate!

22 Jul

Before I start, let me clear something – I’m a big fan of Christopher Nolan and it’s quite rare if I missed any of his work in movies. Likewise, I’m a great fan of Batman comics, having watched almost all animated series, movies and read few comic books as well (it’s really tough to get Batman comics in India, you know.). Also, note that this post contains SPOILERS, so stay away from this post until you watch the movie.

Nolan, as we all know, is a real magician behind the camera. He has a ability to turn any story awesome even if it’s seemingly too complicated (like Memento). So when he took the charge of Batman series with Batman Begins, I’ve every reasons to get excited, and hell I was.

Batman fan’s view –

When I watched the Batman Begins (then I was new to Batman animations, to be true), I was overwhelmed. It was an awesome plot – a great way to introduce a superhero, to show how he became one and at the same time having satisfying amount of action to make audience stick to their seats. For me, this is how a superhero movie should be (Iron Man is suitable example to follow the trend). And when I thought I have seen best of superhero movie, The Dark Knight simply blown me away. The movie had great plot, amazing action scenes and lots of sequences that dazzled me.

But when I went for The Dark Knight Rises, then the realization hit me. It’s not that the movie was bad, in fact, it’s very true to Nolan’s way of direction. But while watching the movie, the Batman fan in me kicked in, spoiling all the fun of Nolan’s art. I started comparing this movie (and past two) with the Batman comics/animations finding many things that didn’t seem fitting.

For any comics/animations/game adaptation, it’s quite okay if you introduce new characters or and new dimension to existing ones. So when Rachael Dawes was introduced in Batman Begins, Gordon had son instead of daughter or Harvey Dent was made lover of Rachael (The Dark Knight) instead the friend of Batman, I was quite fine with it. Even Maroni‘s character was apt, Joker was just perfect. Integrity of every characters was kept intact as in the comics, something a fan of comics will always loves.

In The Dark Knight Rises, things got ugly. There were handful of comics characters in this movie but a lot of them used as they were no one in comics (read Roland Daggett), and the basic characteristics of others has been twisted so much that they don’t feel quite (comics world) Real. For anyone who’ve read Knightfall and the series, would really be annoyed.

In the comics, Bane was monstrous figure, at least when he is on venom. On the same time he was extremely intelligent person and didn’t blow the Gotham City‘s wall for no reasons, as shown in the movie. And of course, since there was no League of Shadows (although there is different League of Assassins), he worked his way out to figure out who the Batman is, and then broke his back. The Bane shown in the movie was apparently an insult to the character. And speaking of insult, how come The Greatest Detective in the World couldn’t figure out who the hell is Talia al Ghul?

Coming to Talia, how could anyone show her a lover to Bane, when she was always shown in love with Bruce. I think she tops the chart of Bruce’s/Batman’s lover’s list (even surpassing Selina Kayle/ Catwoman). Also, the movie has completely wasted Talia and Catwoman to make any impact at all. I was always waiting to see a fight between Catwoman and Batman that simply never happened in the movie.

A bit of movie review –

Like all Christopher Nolan movies, this movie also packs the punch, but it falls short on some places. The characters in the movie doesn’t hold too well. Bane, who’s shown very powerful throughout, had very ordinary impression in the last fight and died way too quickly. Talia’s character was practically wasted, and even Bane could have carried that part with ease (having any random girl in place of Talia).

There were glitches in plot too. Bane was never shown making escape plans and with bomb detonating in few hours and him fighting with Batman, it seems he had suicidal mission, contradictory to the purpose of League of Shadows shown in Batman Begins.

The movie was, as I felt, unusually lengthy (so is my review right now :oops:). There are few places where the it could have reduced in length, especially in the sequence when Bruce tries to climb out of the pit. This movie was also marred by the legacy of amazing two movies that came before this. Unlike Batman Begins‘ amazing character development and The Dark Knight‘s adrenaline boosting sequences, this movie was a bit slow and less action-packed.

Verdict –

In a way, this was a true end of legend as I don’t want to see the 4th installment after watching this movie :P. Maybe, now this series needs a reboot, just like Spiderman. Don’t get me wrong, Nolan has indeed done a great job to complete the franchise, but as Nolan’s (knowing his true ability) and Batman’s fan, I felt a lot falling short.

I think movie is good true Nolan fan, avoidable for true Batman (especially comics) fans. And if you fall in my bracket (being fan of both), all I can say is my sentiments is with you brother! We can neither avoid the movie nor see it with full enthusiasm.

Root any Android phone without hassle!

13 Jan

Android is really a fun mobile OS providing you the ability to customize it the way you like, or to install as many  app you want. But if you really want to take full advantage of the OS, you need to root the device. For those who don’t know, rooting is the method of getting root access (Android is Linux based after all) to the OS, or in other words it’s way to have full permission to practically do anything. Rooting also enable to install the apps which require to perform system level changes/access.

Now, as we know, rooting is powerful and more fun, question comes how we do it? And also if every mobile is rootable or not?

There are several versions of Android and every version is further customized by the mobile phone manufacturer to stand out. But this adds difficulty when it comes to rooting and most of the times the phone doesn’t root at all. And, if you’re not making something (rooting, in this case) you’re actually breaking it i.e. the phone can be rendered useless if not rooted properly. So, before you try, remember your warranty will completely void and you may end up with total plastic which do nothing.

Precautions out, and if you still dare, then here comes a very handy and comfortable tool to root the Android phones – Unlock Root. This is one stop solution to root practically any device running on Android OS version 2.1 (Eclair), 2.2 (Froyo), 2.3 (Gingerbread) and 4.0.x (Ice-cream sandwich). Some notable devices (some of which are pretty nasty to root as well) are HTC Wildfire S, HTC Desire S, Samsung Nexus S, Samsung Galaxy Nexus, etc.

Interested? Just follow these very easy to use steps to root your phone and to unlock the world of possibilities.

Go here to download Unlock Root. Install this and make sure that your device drivers are also installed.

1. Open the Unlock Root application. The main window will open like this –

Main Interface

Unlock Root main interface

2. Make sure that your device must be in USB Debugging Mode. If not then just go to Settings > Applications > Development and then selection the option of USB Debugging Mode.

3. Now once you connect your device to the PC, it’ll be automatically detected by Unlock Root program and a prompt will come just like this –

Device Detection

Device Detection

4. Now you’re presented with very easy to understand two options – Root (the BIG red button) and UnRoot (the other small button). Rooting will essentially install one Superuser.apk file which will in turn grant you full permission.

Root Device

One-click rooting of the device

5. Optionally (but highly recommended by Unlock Root people), you can install Power Saver tool as well to improve the battery life. This can also be done right from the same interface.

Power Saver

Install to extend battery life

6. Finally, you’re done! Now the application will require you to reboot your device and present you with this friendly message.

Reboot

Reboot message

7. Done! Once rebooted your device will be properly unlocked. Enjoy the real freedom!

8. If, for some strange reasons, you want to unRoot your device, you can also do so with the Unlock Root application. Just connect your device and press that small little UnRoot button and you’re good to go.

How to get rid of Facebook Timeline (and bonus)?

3 Jan

If you don’t like the new Facebook Timeline and want it to removed in lieu of old Facebook Profile page, then you should know one thing – Facebook is not gonna do that, at least not anytime soon. So, can you get the old Profile page back by any means? The answer is – Yes, of course you can. Though the method is not official (in fact is complete opposite to that), it’s entirely harmless way to get the old Facebook Profile back. Read on!

Few hours back, Mashable has done the story that Facebook Timeline doesn’t work on Internet Explorer 7, citing Facebook’s recommendation of using most up-to-date version of browser. So, it’s quite simple, use Internet Explorer 7 (IE7) or less and get rid of Timeline completely, isn’t it? The situation is slightly tricky here – First, if you have Windows 7 then you cannot have IE7 installed and latest version of IE(9) is already installed. Also, older version of software means lesser support, buggy experience and most of the all vulnerability to viruses. Also, in case of Facebook, chat will not work properly.

What’s the best way then? Enter the User Agents! Before you ponder about what it is (the Wikipedia page is not very comfortable to understand), lemme tell about this in brief. User agents are like identification of browsers. Simply put, a server identifies the browser by reading it’s user agent. So if you change the user agent, server will recognize you’re using different browser altogether. Easy!

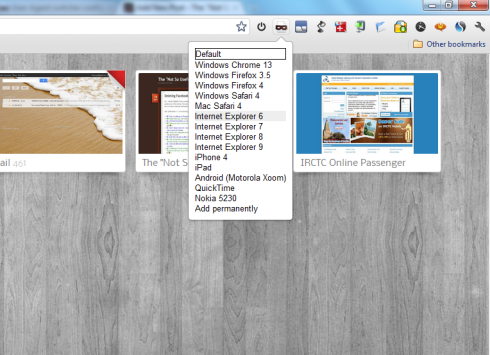
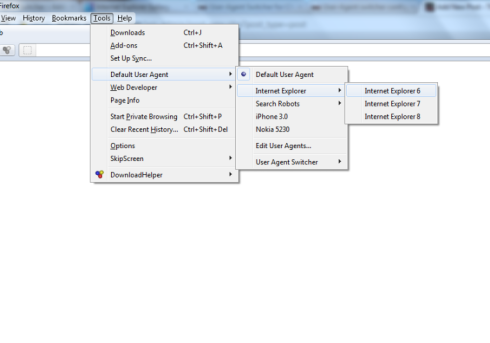
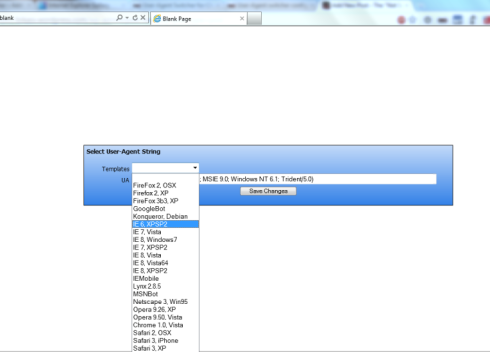
Now one final question arises? How can you change the user agent? Well, there’s an app for that (or extension to be more precise). Download user agent switchers for Chrome, Firefox or Internet Explorer. It’s simple to install and once installed you’ll get the option to switch/change the user agent of browsers (see images below for details). I recommend using user agent of Internet Explorer 6 to be certain that Timeline doesn’t come up at all.

Chrome ua

Change user agent in Chrome

FF ua

Change user agent in Firefox

IE ua

Change user agent in Internet Explorer.

There are other benefits of using IE6 user agent as well – the news ticker will be gone and the chat will cover entire right part of window when opened, much like good old Facebook. once you set the user agent, just refresh the Facebook tab and see the magic! All this and that too without any issue or security problems. But keep one thing in mind, this no-Timeline thing will only appear for you and your friend will still see the Timeline if on supported browser.

Let me know if you like the trick. Till then, Happy surfing!

Facebook Desktop Messenger is here!

30 Dec

Well, almost. Although it’s available to selected few testers currently, but if you follow this link, you can get your hands on it right away! Now, as it’s clear that you can get the messenger damn easy, one question comes to mind – why one should download yet another messenger, especially when you can use web based messenger or, better, use multi-protocol Instant messengers like Pidgin? Nice question! Let’s see if we really need this messenger.

Facebook Desktop Messenger is not just a desktop messenger but it’s also a mini Facebook in itself, sans news feed of course, which makes it unique in itself. Clearly, if you’re Facebook addict, it’s a must have peice of software for you. For others, lemme go through step by step process to help you decide –

Installation of Facebook messenger is fast and easy, but it’s a web based which somewhat makes sense and it’s sole purpose is to used to access feature that requires internet connection. There is no customization feature as well, which is disheartening for tweakers.

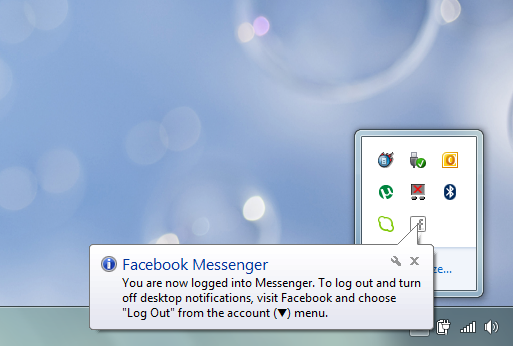
After installation, you need to login to Facebook using your web and once logged, you get to see this message:

First Launch

This essentially means, the only way to log out of the messenger is to log out from web. There is no separate logout for the app. Also, it doesn’t have any customization option whatsoever.

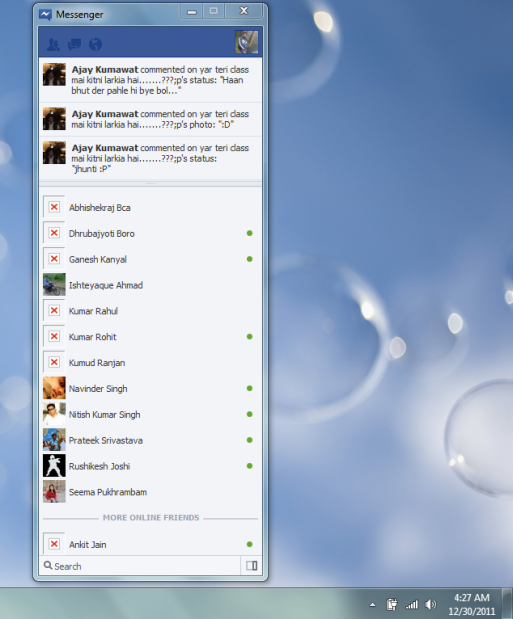
Once launched, you can see the messenger is split into 2 halves – news ticker and list of firends. Surprisingly and thankfully, the size of these windows is adjustable (this is the only customization you can do for this messenger).

Messenger Windows

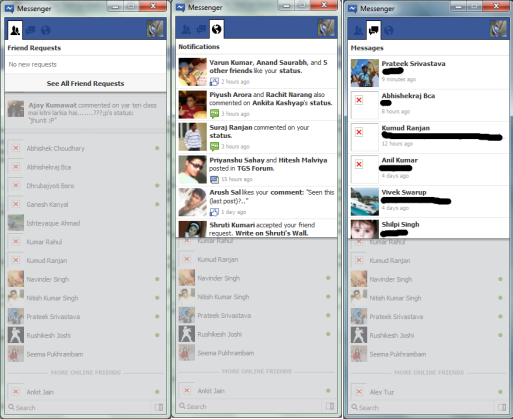
You can see firend requests, notifications and messages as well. Image given below shows that:

Messenger Views

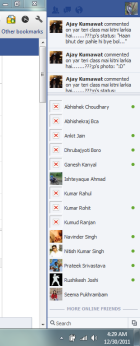
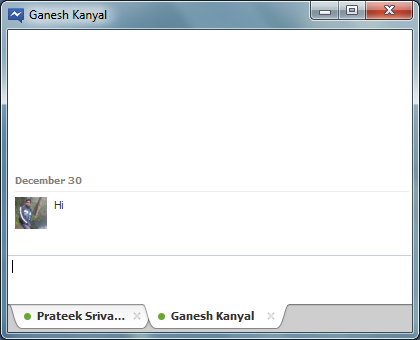
One cool feature of this messenger is that it can be docked to the right of the windows, so that can always see it even if other windows are open. And also the chat window can have multiple tabs, not the first but is really a convinience!

Docked viewChat windows

Overall, it seems a pretty robust chat software and it’s look and feel is quite impressive. As I already said, it’s a must have software for Facebook addicts, but it’s also a very handy tool to try for others, especially if you’ve some friends on Facebook.

Learn new English words without much hassle!

16 Dec

Ah, so long, but wait is sometimes good (I’m not saying it’s going to be good this time though :grin:). Anyway, moving to the blog post of the day (or should I say month, given the last post was on Nov 21st? :???:).

Now, we all know how to read and write in English (I mean or how else you’re reading this post and I’ve written it? Chuck Norris :roll:), but when it comes to use right word, most of us simply fail. Just for example, I’ve used the word right instead of appropriate in last sentence, but appropriate was more, well, appropriate! And sometimes, people also get confused with the words. A friend of mine loves to call himself Simpleton thinking it’s very simple person!

So, how we improve our limited English vocabulary? It’s simple, we learn (Eureka, huh :evil:), but in slightly interactive way (Hmm, listening, aren’t you?). Below are the 3 websites that can help you grasp more words relatively easily (just relatively, you won’t become Shakespeare in one day :!:).

1. Graph Words:

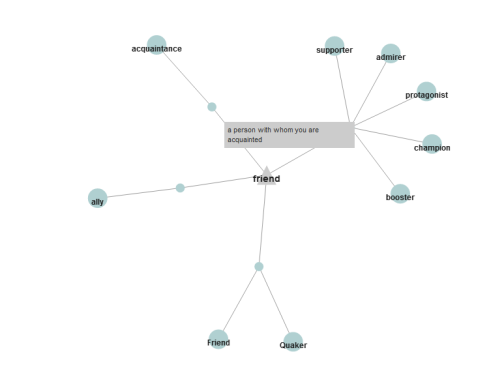
It’s one of the most intuitive website I’ve ever seen in learning space. Graph Words is, by definition, a online interactive English dictionary and thesaurus that helps you find the meanings of words and show connections among associated words. If this goes over your head, just like it did in my case, it’s simply a graphical representation of the words you search with the possible synonyms. Your searched word is connected to it’s set of synonyms and the connection tells you the meaning of word. So, you know what exact word is to be used in the given situation.

A simple word graph for word friend is given below –

Graph Words - Friend

Search graph for the word Friend

2. Vocabulary:

Well, name says it all. It’s great vocabulary resource. But the interesting part of the website is when you visit, it present you with objective type assessment with point system. This assessments, although contains simple words, helps in knowing words and it’s use in pretty decent manner. But the fun gets multiplied when you enter the website. By default, they compare few similar looking words (remember simple and simpleton? :twisted:), but as you search, you’ll get the word suggestion (don’t need to remember spellings, wow!) and once selected, the you’ll see full page for the given word explaining everything about it. Quite cool, isn’t it?

3. Learn Word List:

Although the site says it’s a Free Vocabulary test Prep for GRE, GMAT, TOEFL, SAT, but you can use it for any purpose (they haven’t restricted us from doing so, I swear). This is the only website I find till now which has famous GRE flash cards, and it’s quite awesome! You can learn new words quickly and the use it to revise as well. Generally, there’s not much help in this section apart from the meaning of the words and it’s use in one sentence, but fret not, any further details needed is taken care in subsequent tests this site has. There are quite a varied selection of tests covering practically everything related to the words.

So, with these websites, I think you’re practically covered. Learn about a word through Vocabulary, get it’s meaning graph through Graph Words and finallyprove your skills on Learn Word List and you can call yourself pro! And before I part away, You can always use Google’s define method for quick reference.

After Gmail overhaul, it’s YouTube’s turn!

21 Nov

It seems Google has decided to overhaul the User Interface of it’s entire services. Few months back we’ve seen the redesign of Google’s homepage, then few weeks back we’ve seen complete redesign of Gmail, and now it seems that YouTube‘s next.

But for YouTube, it’s not that easy. Right now, Google’s is just testing the new layout and it’s not yet available even in TestTube. But fret not, the method to enable new UI is pretty straight-forward and easily revertible too. All you need is to play with the cookies, and in case you want to revert to older looks, just delete the cookie, simple!

So, how do you get the new UI? Just follow these easy steps –

  • Open your web browser and navigate to YouTube. Right now, this method seems to work only in Chrome, Firefox and Internet Explorer 9 (I’m using the Chrome for the process right now).
  • Open developer tools – Press F12 in IE9, Ctrl+shift+j in Chrome and Ctrl+shift+k in Firefox for quickly open the developer tools.
  • Now navigate to console part and enter the following code:

document.cookie=”VISITOR_INFO1_LIVE=ST1Ti53r4fU”;

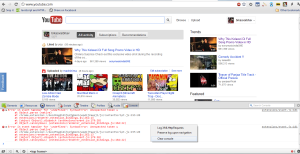
Developer Console

Clear your console before proceeding, if you wish.

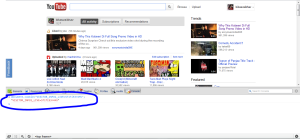
Developer console input

Just input the code shown and you're done.

  • Done! Just close the developer tools and refresh the YouTube page and you’ll land into new refreshed page.
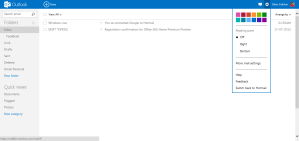
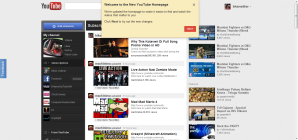
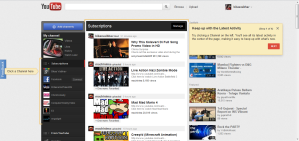
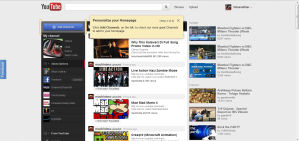
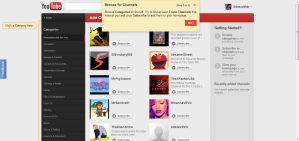
After the refresh, you’ll see a simple guide to the changes done. If you like follow these to learn or simply take a look at the images below. Also to note, these changes goes pretty well with CosmicPanda, released by YouTube some time back and I strongly recommend to use this as well to have an immersive experience.

(click images to enlarge)

YouTube - 1

YouTube - 2

YouTube - 3

YouTube - 4

YouTube - 5